From the
Wizard:
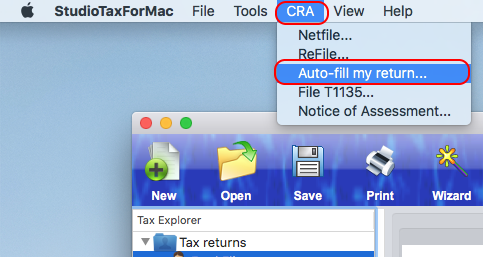
From the Tools
menu:
If you have a CRA online My Account access, then you can use the Auto-fill my return feature with StudioTax to retrieve your tax data, preview the data and select the data that you want to add to your return.
The auto-fill feature can be accessed from 2 different locations in the software:
This section presents the steps required to retrieve and add the tax data to the return. It is important to know that the process is not entirely handled by StudioTax. There are 3 main steps where one of those steps is handled by the Internet Explorer browser:
Step1: The starting the service is handled by StudioTax Auto-fill interface .
Step2: E ntering the user id and password is handled by the default web browser. The CRA requirement is to perform this step through the browser and not through the tax software.
Step3: The rest of the process is handled by StudioTax Auto-fill interface. At this step you can preview and optionally add the tax data to the return.
Step 1 - Start the
process
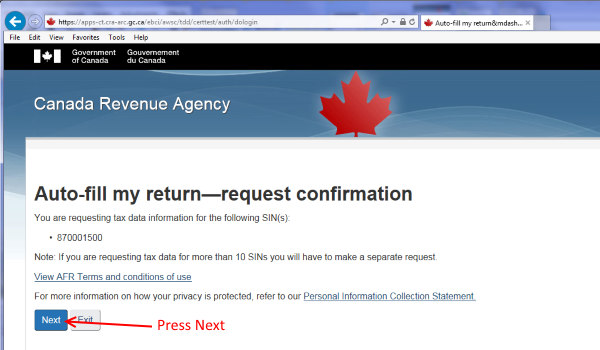
For
this walk through the "CRA->Auto-fill
my return ..." menu is used to start the process. The Auto-fill my return
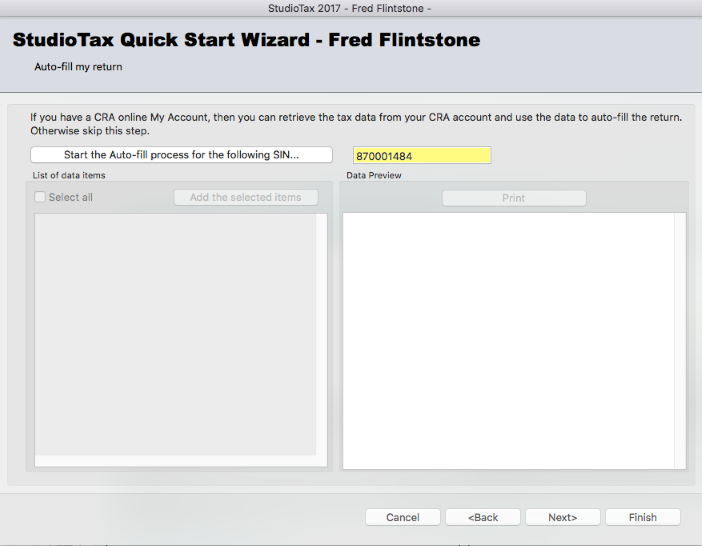
window will be invoked and you need to press the button (1)
indicated below:

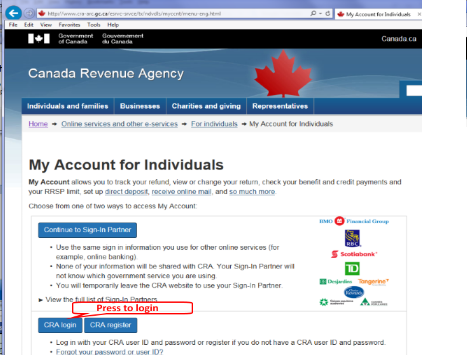
StudioTax starts the default browser and wait
until CRA server signals to StudioTax that the client has logged in and the
server is ready to send the tax data to the software.
The next step is the authentication using the web browser. Note that this step may look slightly different:
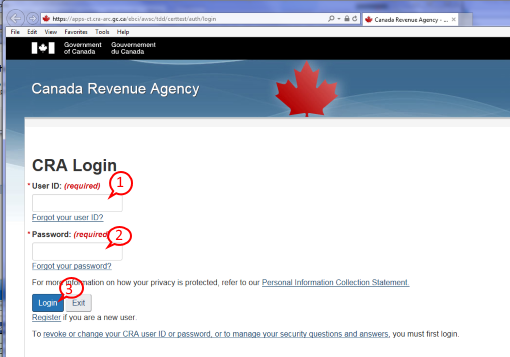
You need to enter your user id(1),
password(2) and press Login(3). This step have to be completed within 3 minutes
otherwise the operation may times out and you have to
restart.
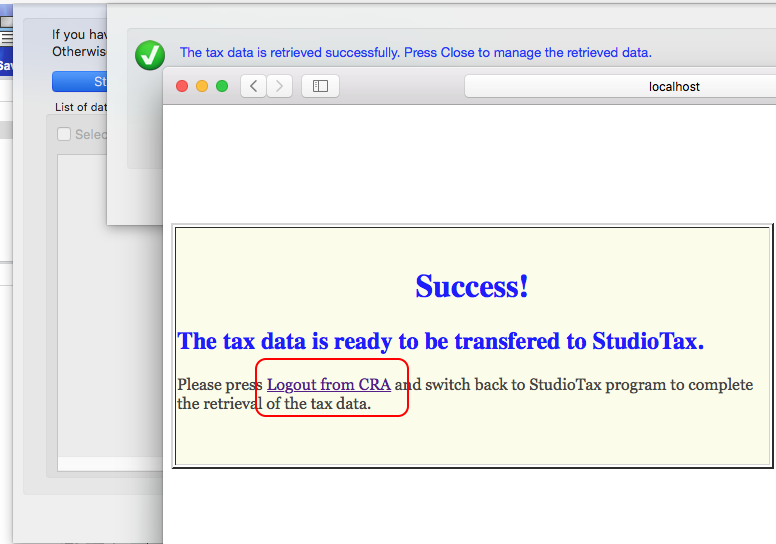
After you press the CRA server will signal to StudioTax that it is ready to send the tax data. It is important to note that StudioTax has no access to your CRA online account and that the CRA server is in control and sends to StudioTax only the tax data.
At the end of the CRA authentication and transfer of the data, the browser loads the following page that allows you to disconnect from the CRA account:
Step 3 - Managing the
tax data
StudioTax receives
the tax data and updates the Auto-fill window:
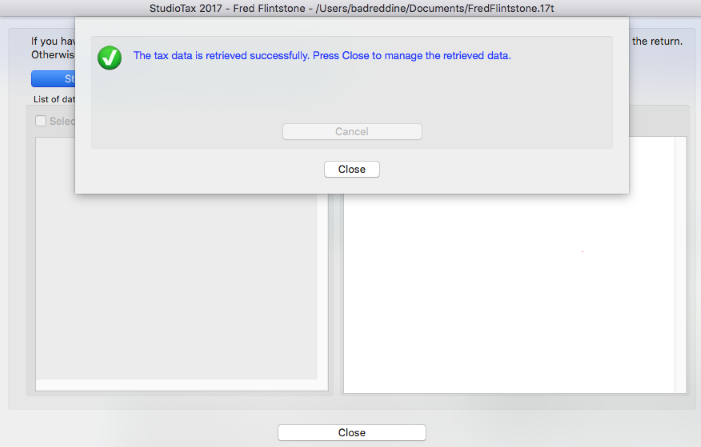
Press Close to continue:
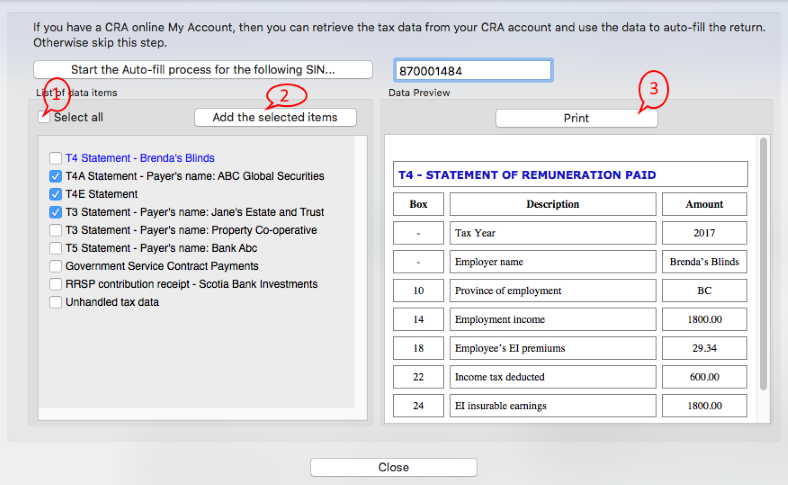
Now you can manage the retrieved tax data. Select the item you want to preview. You can tick the items you need to add to your return or toggle the "Select all" box(1) to mark all the items for addition or clear the selected items. You can press the Print button(2) in case you need to keep a record of the tax data. If you want to add the selected items to your return, then press "Add the selected items" button (3).
It is important to note that the tax data is added to your return but it does not update or replace existing tax data. That means if you run the process twice and add the same data, then your return will end up with duplicate data.