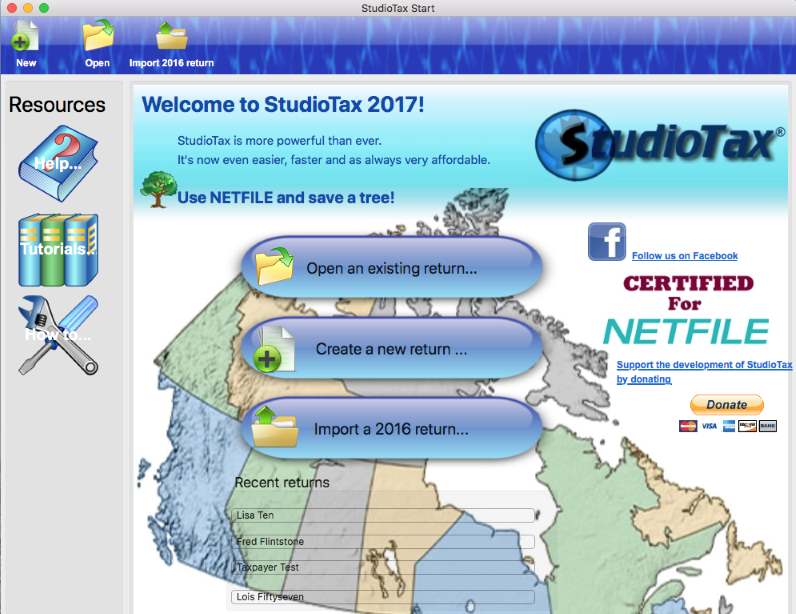
After completing the installation steps, you can start StudioTax by a double click on Studiotax program icon found on your desktop. The first time you start Studiotax, it will look similar to the following picture:
Even though the starting window looks like a web page, Studiotax is not a web based application. Studiotax is a Windows program that resides on your computer and does not access the internet except if you click on the "Check for updates..." link. This is similar to any other Mac application such as Word that creates .doc documents and save them on the local hard drive. In the same way, StudioTax creates tax documents with .17t extensions and saves them on your computer local hard drive.
It's recommended that you take the time to read the short introductory section Getting Started with Studiotax section to quickly learn about the main components of StudioTax.
Once you are ready to create your first return, you can click on the "Create a new return..." button to invoke the quick start.
If you already created your previous year's return using Studiotax, then you can use the "Import a 2016 return..." button to create a new 2017 return using relevant information from your 2016 return. In this case the wizard is pre-filled with the information imported from the 2016 return. Note that only returns created by StudioTax 2016 can be used to create a new 2017 return.
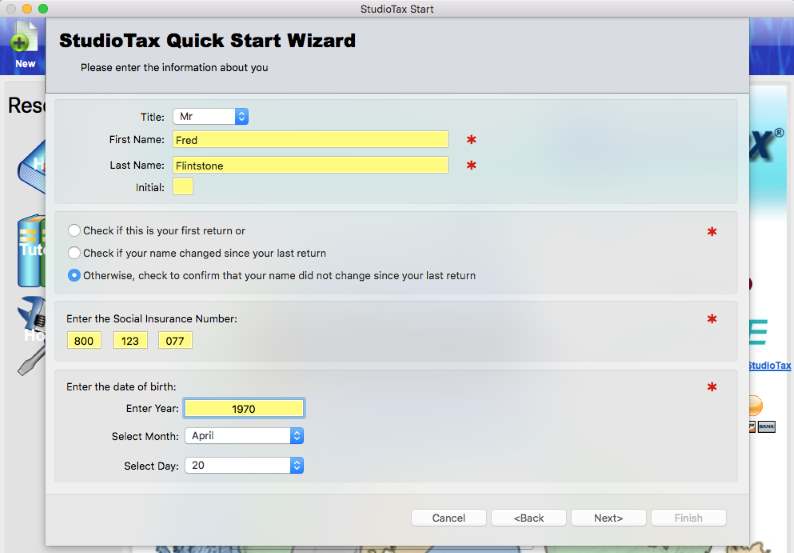
The first Wizard page contains a list of instructions to help you use the Wizard. The next 2 pages of the wizard are used to enter your personal and address information. Make sure that all fields marked with red stars are filled before pressing "Next>":

The next page is used to enter your marital status information:

If you select married or common law for your marital status, then you will be prompted if you want to create a spousal linked return. Use the linked return option(2) if you want the software to manage automatic transfers between both returns. To make working with linked returns easier, the software provide different color themes that you can override (3) with your favorite color. The selected color will be used when you switch from one return to the second and make it obvious what return you are modifying.
The next few pages are used to enter various required and optional information needed by CRA. You will be required to answer few questions. If none apply to you then skip the page by clicking on "Next>". If they do apply, then check the proper boxes and type in the appropriate answers before pressing "Next>".

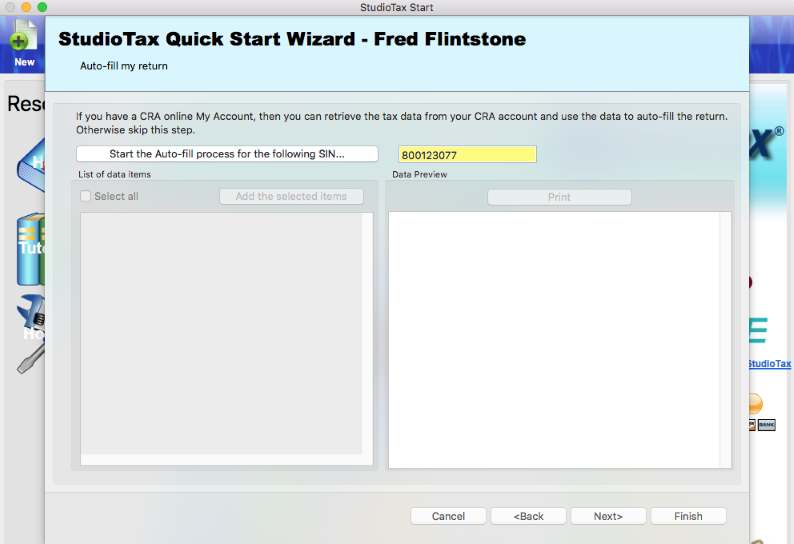
A new feature called Auto-fill my return was introduced for tax year 2016 where you can download tax information from your CRA online account. You can use the following Wizard page to make use of this feature. Form information refer to the Auto-fill help section. Noe that this is an optional step that you can skip by pressing Next and continue to enter your information manually directly to the software as you would have done in previous years.
Pressing Next would take you to the last wizard's page.
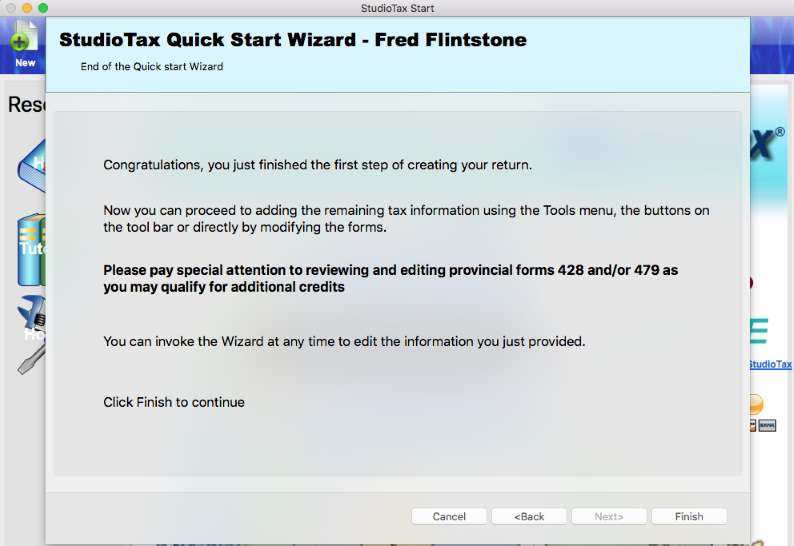
You can press Finish and continue providing the rest of your tax information using the tax Forms and Tslips forms.
If you are familiar with the Windows version of StudioTax, then you would notice that the Mac Wizard is missing few pages compared to the Windows counterpart. However, there is nothing you can enter on the missing wizard's pages that you cannot do in different ways. For instance you can use Tools->Charitable donations menu to enter the donations. You can use the RRSP/HBP/LLP button on the tool bar can be used to access the RRSP entry form. And of course the T slips tab to access the various T lips. The Dependants button on the tool bar for entering the Dependants info.