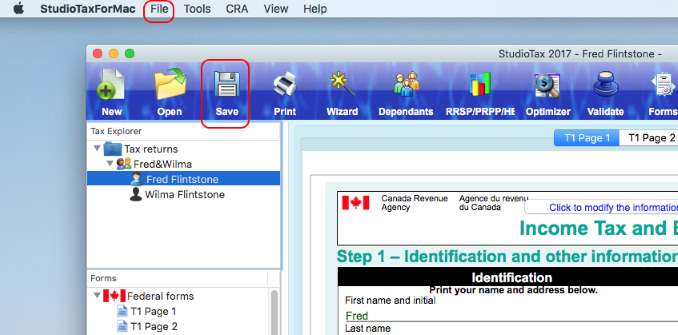
After exiting the quick start wizard, StudioTax loads the main Federal and Provincial forms. A new set of tabs are created that can be used to easily navigate through the forms:
The first task you need to do is to save your return. Use the Save button or File menu highlighted above to save your return to a file. The file extension is .17t(for 2017 returns) and by default Studiotax will try to save under the Home folder. You can browse to a different location and/or change the file name. It's recommended that you keep the file extension to the software default extension. Never change the extension to a .TAX since that extension is reserved to the NETFILE file format. The Next tutorial page describes how you can create a .TAX Netfile file.
Even though you can start the Wizard at any time to modify some tax information, it is faster to just go to the form or TSlip directly and make the change. For example you can enter the T4 slip info using the TSlip tab(1) shown on the next picture:
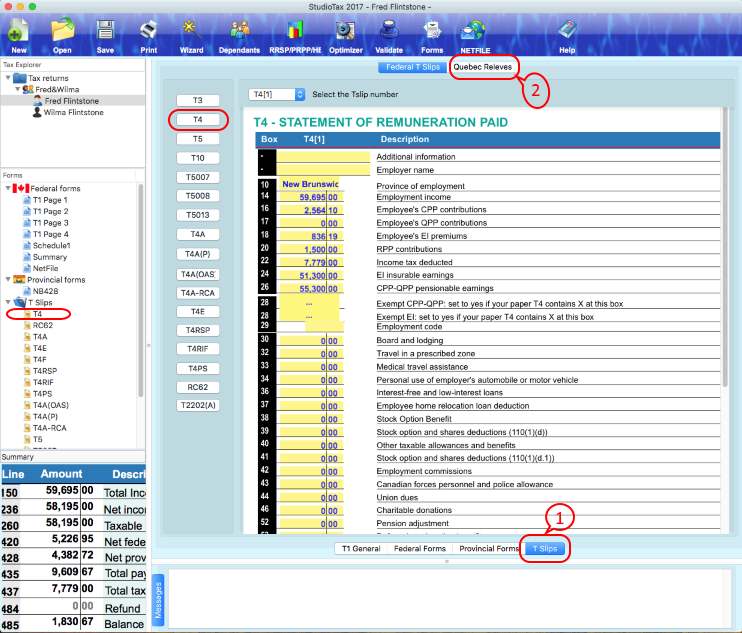
If you received a Quebec RL1, then you can check the Quebec RL slips(2) and enter the RL1 amounts.
Much the same way as any other Mac application, you can save your return, exit Studiotax and at a later time continue working on your return.
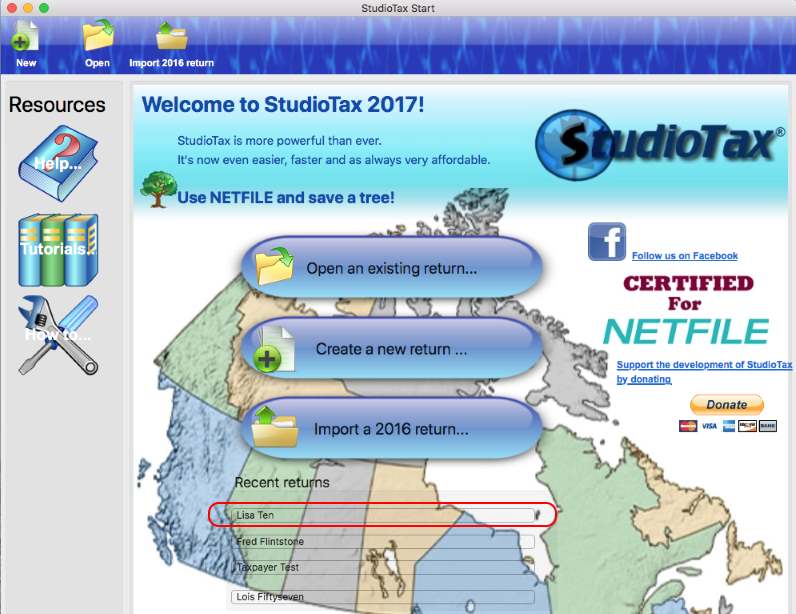
When you restart Studiotax, you will notice a button that links your saved return. StudioTax maintains links to the last 4 returns you loaded. You can click on the button and open your return to resume. You can also use the "Open an existing returns..." button or the File->Open menu.
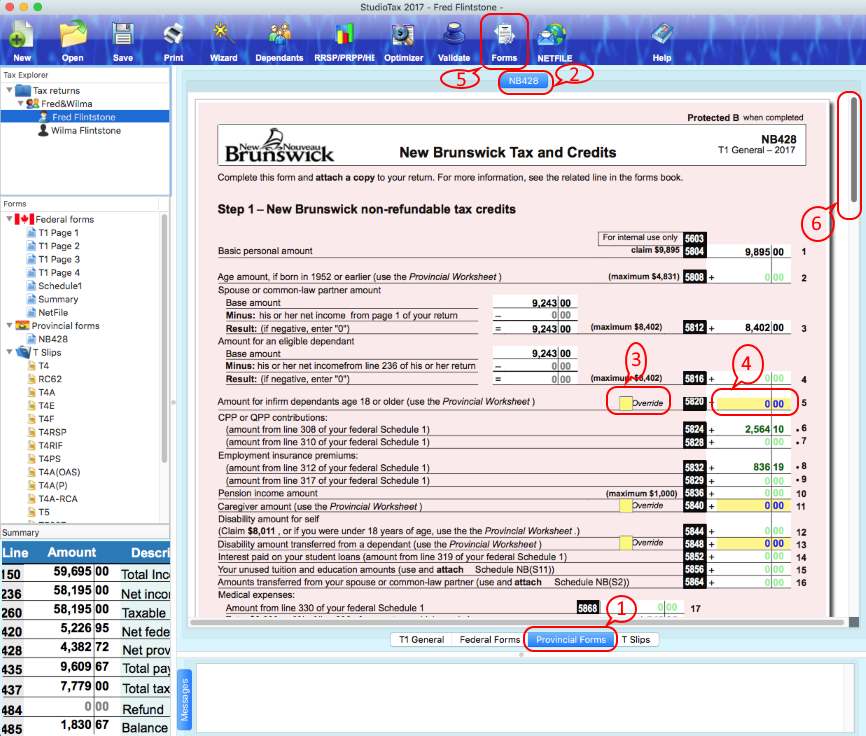
In this example the user wants to share the amount of line 5820 of NB428 with the spouse. This particular amount is calculated by the software using the information entered using the Dependands button. The software by default would allocate the credit to the return with the higher net income. Use the following simple steps to modify the software default: (1) click on the Provincial Forms tab, (2) click on NB428 tab, (3) tick the override check box and finally enter an amount at line 5820.
You can use the Forms button(5) to open more forms. Many forms are made of 2 or more pages, use the scrollbar(6) found on the left of the form to view all the pages.
The Forms button invokes the forms listing window where you can see both the available federal and provincial forms. You can add/remove any form. Studiotax maintains a set of forms loaded all the time that you cannot remove. For example Schedule 1 is always loaded under the Federal Forms tab.
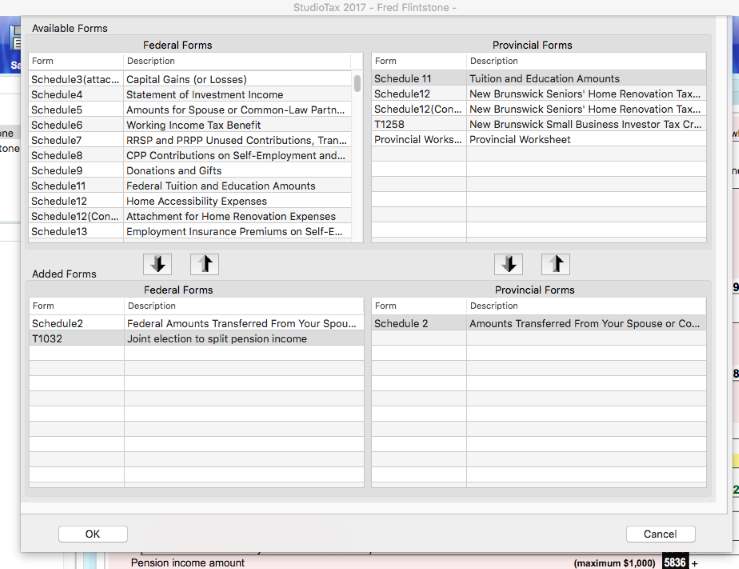
Note that adding or removing a form does not mean that you added/removed that form to/from your return. The forms are used to display your tax data maintained in Studiotax memory. For example you can add or remove schedule 9 from the added forms but as long as you have charitable donations, Schedule 9 will be part of your return.
After you finish editing and reviewing your return, you most likely want to file your return by sending it to CRA. You have 2 options you can use to file your return: 1) Print it, sign it, attach you receipts and copy of your TSlips, and mail through the post office to CRA or 2) use the Netfile button to file your return electronically to CRA.
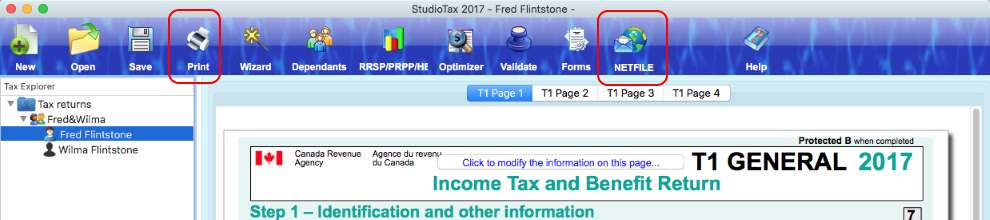
To print your return use the "Print" button and follow the instructions provided by the Print wizard. Use the NETFILE button to invoke the Netfile wizard that will assist you in generating a .TAX file. The next tutorial page will provide a detailed description of filing your return electronically.